How To Make A Teddy Bear Cake That Kids Will Love |
您所在的位置:网站首页 › teddy bear coloring pages printable › How To Make A Teddy Bear Cake That Kids Will Love |
How To Make A Teddy Bear Cake That Kids Will Love

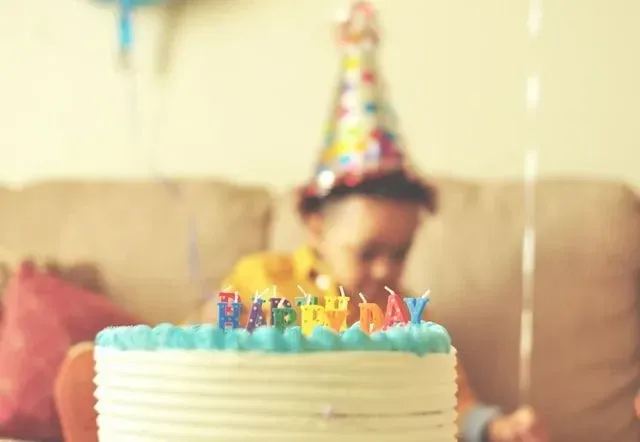
Get Inspiration For Education! Subscribe for virtual tools, STEM-inspired play, creative tips and more Image 漏 adka100, under a Creative Commons license. Cute, warm, and cuddly - what's not to like about a teddy bear? If your child's birthday is coming up and you are stuck on which cake to bake them, why not try out our simple step-by-step recipe for a teddy bear birthday cake? This easy birthday cake is sure to be the life of the party and put a smile on everyone's face, especially those who love to cuddle up to their stuffed animals at night. Not too experienced at cake decorating? That won't be a problem. Children's birthday cake recipes can often be complicated, but this teddy bear cake tutorial is so simple to follow, anyone can make this delicious teddy bear face chocolate cake! IngredientsFor The Cake: 200g self-raising flour, 40g cocoa powder, 230g caster sugar, 4 eggs, 230g softened butter or margarine, 1/2 tsp vanilla extract, 100g plain milk chocolate, and 2 tsp milk. For Icing And Decoration: 600g icing sugar, 250g softened butter, 3 tbsp of milk, 100g cocoa powder, chocolate buttons, and some white fondant. Equipment: Two 20cm round cake tins, a medium-sized cake board, a 9cm round biscuit cutter (or a round template drawn on paper and cut out), and a piping bag with a decorating tip.
Image 漏 Rodrigo Souza, under a Creative Commons license. MethodThis recipe provides 12 servings and takes approximately 2 hours 15 minutes from start to finish, including baking and cooling time. For The Cake: 1) Pre-heat your oven to 160掳C, then grease and line your cake tins with baking paper. 2) Grate your chocolate carefully into a small bowl. 3) In a large bowl, combine all ingredients (including the grated chocolate) and mix for a few minutes until well combined. 4) Divide your cake mixture evenly into your two prepared cake tins, and use the back of a spoon to smooth down the surface. 5) Place the cake tins in the oven for about 30 minutes, or until slightly firm to the touch or a skewer comes out clean. 6) Remove from the oven and allow to cool for about 15 minutes. Then, carefully remove from the cake tins and allow to cool for at least another 45 minutes before decorating.
Image 漏 Peggy_Marco, under a Creative Commons license. For The Icing And Decoration: 1) Place the butter into a large mixing bowl, then sift in the icing sugar and mix well until smooth and creamy. 2) Add in the milk, and beat the mixture until fully combined. 3) Mix in a small amount of cocoa powder, just enough to turn the buttercream into a light brown/cream colour. 4) Place 1/3 of the buttercream into a separate bowl and set aside. 5) Add more cocoa powder to the remaining 2/3 of the mixture, until you reach a nice teddy bear brown colour. 6) Cut one of your cakes in half horizontally, and sandwich it back together with about 1/4 of the cream coloured buttercream. Carefully place this down onto your cake board. 7) Cover the entire cake in the brown chocolate buttercream, but make sure to leave a bit in the bowl. 8) Use your biscuit cutter or template to cut out three circles from the other cake - these will be your nose and two ears. 9) Cut away a small rounded piece of each of the ears, so that they can fit against the curved shape of the top of the cake. 10) Cover your small teddy bear nose with the light brown/cream buttercream, and then cover the edges of the two ears with the darker brown, and the inner ear with the lighter coloured cream. 11) Place the nose on top of the cake and then place your two ears on either side of the cake onto the board. 12) Using a fork, gently press all over the buttercream icing to create the illusion of fur.
Image 漏 White77, under a Creative Commons license. 13) Cut two small circles (just larger than the size of a chocolate button) out of your white fondant, and gently place this onto the teddy cake as its eyes. 14) Use a drop of buttercream to stick down a chocolate button onto each of the white circles. Stick another button down onto the nose. 15) Finally, melt the rest of your buttons and pour the melted chocolate into your piping bag. Choose the smallest decorating tip, and carefully pipe on the rest of the teddy bear snout. 16) Step back and admire your teddy bear chocolate cake, and get ready for your kids to be impressed! Tips, Substitutes And StorageIf your children aren't huge chocolate lovers, you can replace the cocoa powder in the cake recipe with flour. Instead of using cocoa powder in the buttercream, you can use brown food colouring. An alternative idea for decorating in this teddy bear cake recipe is to use piping bags and a decorating tip, to pipe the fur all over the cake instead of spreading the icing and using a fork. This cake isn't just good for birthdays, either. Teddy bears are also a great theme for baby showers and christenings, so feel free to use our bear cake tutorial over and over again! Children as young as two may enjoy helping you mix up the ingredients, but those seven and over may be better suited for the cake decorating. Either way, anyone over the age of one year can enjoy a taste. If you need to make this cake suitable for those with allergies or a food intolerance, the butter, eggs, and milk can all be replaced with vegan or dairy-free alternatives. There are also plenty of vegan fondant brands and chocolate buttons available in the supermarket, too. If you don't manage to finish the cake all in one go, don't worry! You can keep it for up to five days in an airtight container at room temperature, or wrap it up in clingfilm and foil and freeze it for up to three months.  Written By
Rachel Garner
Written By
Rachel Garner
Rachel grew up in Switzerland and currently lives in north-west London. She is an avid reader, writer, and a real foodie and loves discovering new hotspots and trendy places to go in the city. She also enjoys planning days out for her family, she especially loves taking her little cousins swimming and to the park. When she has some free time she loves going to concerts, baking, or visiting her family at their home in Essex. She can sometimes be found travelling a bit further than Essex and loves meticulously planning and researching a trip before heading off to explore new places in Europe and further afield. Read The Disclaimer DisclaimerAt Kidadl we pride ourselves on offering families original ideas to make the most of time spent together at home or out and about, wherever you are in the world. We strive to recommend the very best things that are suggested by our community and are things we would do ourselves - our aim is to be the trusted friend to parents. We try our very best, but cannot guarantee perfection. We will always aim to give you accurate information at the date of publication - however, information does change, so it鈥檚 important you do your own research, double-check and make the decision that is right for your family. Kidadl provides inspiration to entertain and educate your children. We recognise that not all activities and ideas are appropriate and suitable for all children and families or in all circumstances. Our recommended activities are based on age but these are a guide. We recommend that these ideas are used as inspiration, that ideas are undertaken with appropriate adult supervision, and that each adult uses their own discretion and knowledge of their children to consider the safety and suitability. Kidadl cannot accept liability for the execution of these ideas, and parental supervision is advised at all times, as safety is paramount. Anyone using the information provided by Kidadl does so at their own risk and we can not accept liability if things go wrong. Sponsorship & Advertising PolicyKidadl is independent and to make our service free to you the reader we are supported by advertising. We hope you love our recommendations for products and services! What we suggest is selected independently by the Kidadl team. If you purchase using the buy now button we may earn a small commission. This does not influence our choices. Please note: prices are correct and items are available at the time the article was published. Kidadl has a number of affiliate partners that we work with including Amazon. Please note that Kidadl is a participant in the Amazon Services LLC Associates Program, an affiliate advertising program designed to provide a means for sites to earn advertising fees by advertising and linking to amazon. We also link to other websites, but are not responsible for their content. Was this article helpful? How can we improve it? How helpful was it?Get Inspiration For Education! Subscribe for virtual tools, STEM-inspired play, creative tips and more
You might also like
 October Birthday: Ideas For Themes, Cakes, And Gifts
 A January Birthday: The Ultimate Guide To Presents, Parties, And Fun Facts
 The 12 Best Ideas For 6 Year Old Birthday Parties
 Planning A Two Years Old Birthday Party: Games, Food & Decor
|


【本文地址】